The MySQL database is one of the most popular options for users who need a system to manage SQL database files. MySQL allows users to import their database files into it or export them as a .sql file, usable in other SQL databases. This feature makes it easy to back up and transfer databases.
In this tutorial, we will learn how to import and export data from a MySQL database.
Importing and exporting the database is done through phpMyAdmin. phpMyAdmin is the primary database management tool in cPanel hosting.
Exporting a MySQL Database in phpMyAdmin
Server and website management platforms like cPanel typically use phpMyAdmin, a web-based interface, to manage their web servers. If you have access to the cPanel panel and want to export database information on its web server, follow these steps through phpMyAdmin.
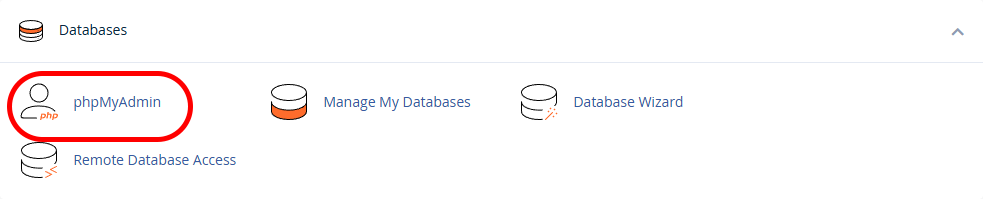
- Log in to your cPanel hosting.
- In the Databases section, enter phpMyAdmin.
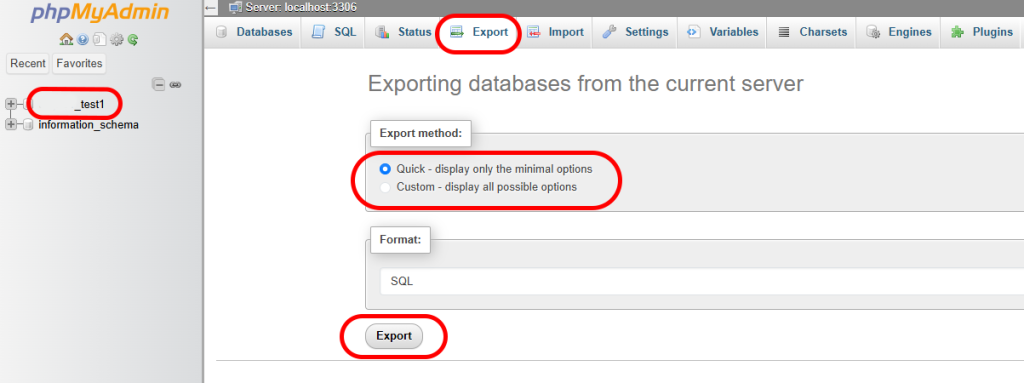
- On the left side of the page, select the database you want to export data from.
- Select the “Export” option from the tab at the top of the page.
- Set the Export Method to “Quick”.
- Make sure the output will be created with the SQL type.
- Select the “Export” option to start downloading the file.
Importing a MySQL Database in phpMyAdmin
- Log in to your hosting cPanel.
- In the Databases section, enter phpMyAdmin.
- On the left side of the page, select the database you want to import the data into.
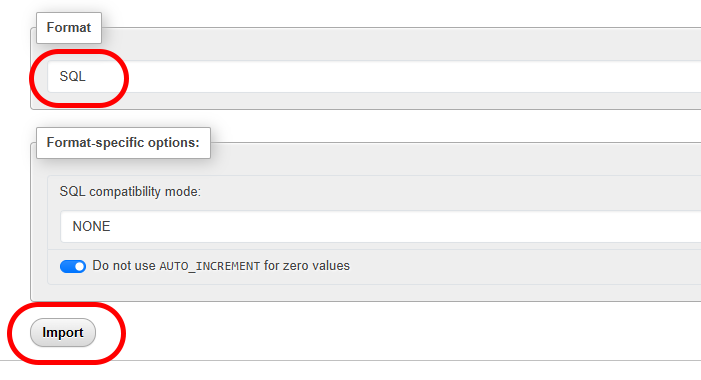
- Select the “Import” option from the tab at the top of the page.
- In the File to Import section, select Browse and choose your database file with the .sql extension.
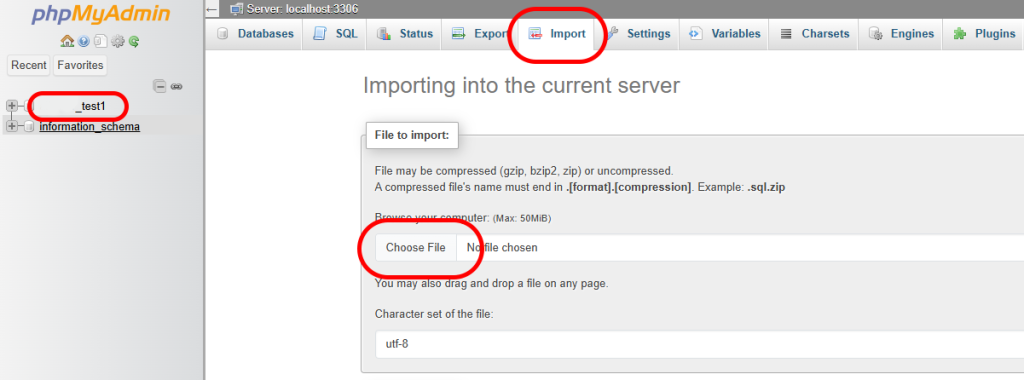
- Set the file import format to SQL.
- Select the Import option to start importing the database information.
Exporting (Dumping) a MySQL Database in Command Line Environment
MySQL databases offer various ways to export database content. One of these methods is through CLI or Command Line Interface commands, which users of VPS or virtual server services can use to export their MySQL database via their virtual server terminal.
Using these commands is possible on both Linux and Windows Server VPS.
Exporting Database Information via mysqldump
Note: The commands entered in this tutorial section have been executed by the root user on the server. If you have access to your terminal environment as a user separate from root access, you can execute the commands through it. In this case, you may need to create a new database user or user database.
The MySQL database includes the mysqldump command, through which you can create a new text file or dump file that contains all the information related to your database. Once the file is created, you can use it as a backup or even share it.
- Enter the following command in your server’s terminal window. You need to replace the [database] section with the name of your database and the [dump-file] section with the name you want your SQL file to be created with.
mysqldump –u root –p [database] > [dump-file].sqlIf the command is executed successfully, no message will be displayed in the terminal. The new file will be created in the same directory where you executed the command. To execute this command in Windows, you need to refer to the path of the mysqldump.exe file for it to be executed.C:toolsmysqlcurrentbinmysqldump -u root -p [database] > [dump-file].sql
To avoid having to enter the entire command, you can enter mysqldump in the environment variables in Windows. In this case, there is no need to fully refer to mysqldump.exe.
head –n 5 [dump-file].sql 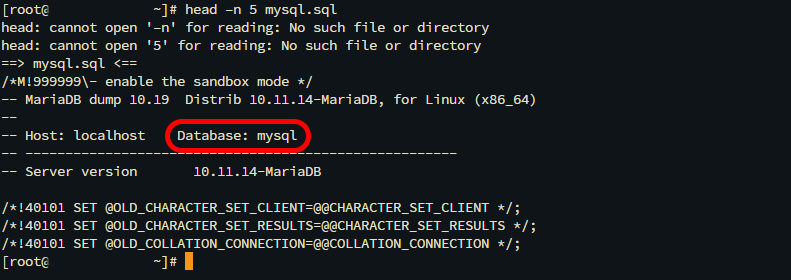
To do this in Windows, you need to enter the Get-Content command:Get-Content -TotalCount 5 dump-file.sql
After entering the command, a message indicating successful file creation will be displayed. By viewing the Database section, you can ensure the file creation operation was successful.
Also, the new file will be created in the directory where you executed the commands.
Importing a MySQL Database in Command Line Environment
The environment from which we created the MySQL database export file also has the ability to import that information into a MySQL database. This method is usually used when the size of the database file we want to import is large and importing it via phpMyAdmin results in an error.
Importing Database Information via mysqldump
Importing an SQL file into a database requires MySQL to be installed locally on that server, as well as creating an empty database in it. This is because we need to import the file information into it. If you have not already created your database on the server, we create an empty database as follows.
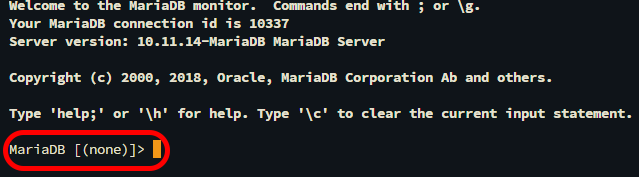
- Execute the MySQL Shell environment using the following command. This command will take you to an environment where you can use SQL commands.
mysql -u root -p
In Windows operating systems, use this command:[path-to-mysql-binary]mysql –u root –p
- If required, enter the password for the root or Administrator user. You will then enter the MySQL command environment.
- Create a new database by entering the following command in the MySQL environment. Replace the [database] section with the name you want to choose for your database:
CREATE DATABASE [database];

After creating the database, the message Query OK will be displayed, which means that your database creation process was successful.
- Exit the MySQL command environment by pressing Ctrl + D or entering the command `exit`.
After creating your database, import your database file into it using the following commands:
- Enter the following command. Replace the `[database]` section with the name of your database and the `[dump-file]` section with the name of the file you want to import into your database:
mysql –u root –p [database] < [dump-file].sql
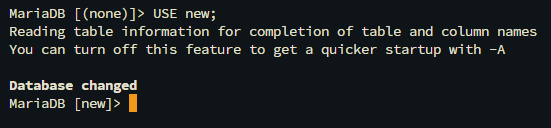
In Windows, you need to refer to the mysql.exe file to be able to import your database file into your database:C:toolsmysqlcurrentbinmysql –u root –p [database] < [dump-file].sql - To verify that the database import operation was successful, re-enter the MySQL shell environment and load your database with the following command. Replace the `[database]` section with the name of your database.
USE [database];
- The content of your database will be displayed with the following command:
SHOW TABLES;
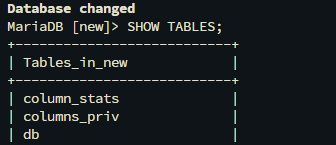
As a result of the command, you can check whether the imported databases exist in your database or not.