
In the world of web development, proper data management and speed optimization are two crucial factors for the success of a website or application. If you are using a cPanel Shared Hosting service, you have likely encountered MySQL and perhaps heard of Redis.
What is a Database and Why Do We Need It?
A Database is a location for permanent data storage.
Any website or application that deals with user information, products, articles, or settings requires a database.
Examples of data stored in a database:
- User information (name, email, hashed password)
- Blog posts or store products
- Orders, payments, and reports
- System settings
On cPanel-based hosting, you typically use:
- MySQL
- MariaDB
It is used when both are relational databases.
What is Redis?

Redis is an in-memory database, but unlike MySQL, it is not designed for permanent data storage.
Also, in this HiData article, you can find complete information about Redis database and how it works.
MySQL vs. Redis
| MySQL | Redis |
|---|---|
| Permanent data storage | Temporary data storage |
| Disk-based | RAM-based |
| Suitable for core data | Suitable for caching and sessions |
| Slower speed | Very fast |
It’s important to note that Redis is not a replacement for a MySQL database, but rather a complement to it.
Core data is stored in MySQL, while frequently used or temporary data is kept in Redis.
Step 1: Creating a Database in cPanel
- Log in to your cPanel in your hosting account.
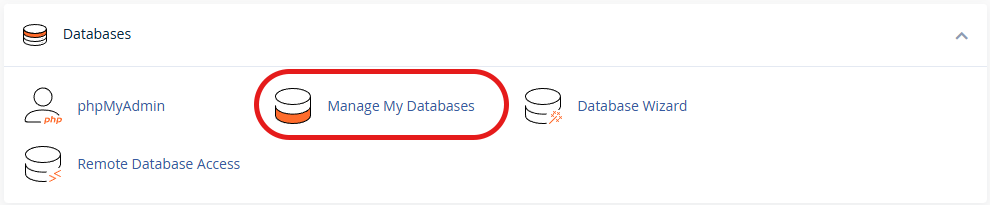
- In the cPanel, select Manage My Databases from the Databases section.
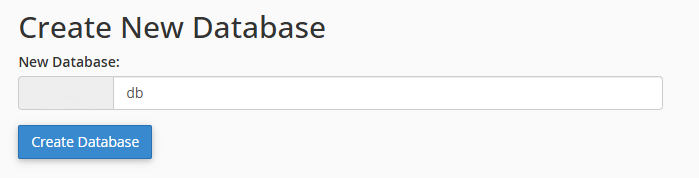
- Enter your database name and then select the Create Database option.
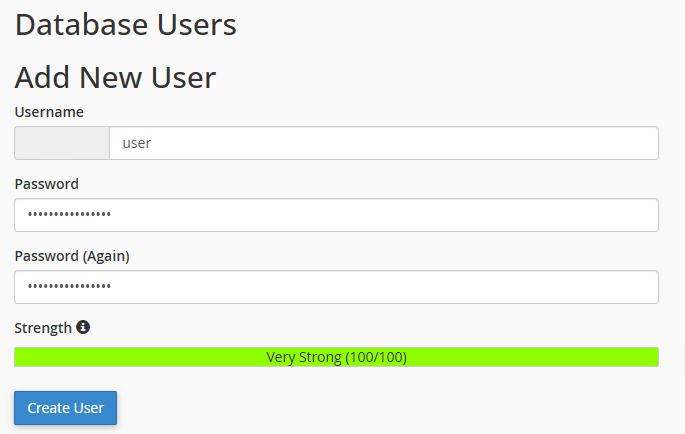
- Scroll down to the bottom of the page and create a Database User for your database. You will also need to set a password for the user in this section.
- In the Add User To Database section, add a user to your database. In this section, you will also need to configure the user’s access permissions within the database.

Note: Prefixed Names in cPanel
In cPanel, all databases and users are created in the following format:
username_databasename
username_dbuser
In the username portion, your cPanel hosting account name will be used. Therefore, you need to use this name combination when configuring your database.
Enabling Redis in cPanel
- Log in to your cPanel account through your hosting service.
- In the Software section, select Select PHP Version.

- In Select PHP Version, ensure that your hosting account’s PHP version is set to a version other than Native.

- Go to the Extensions tab and enable the Redis option.

This option is usually enabled by default on your hosting account. In cPanel services, the Redis database is created within a cagefs environment. In this case, you need to save the address related to the redis.sock file on your host. Also, in this Redis configuration, its default port is 0.
Connecting Your Application to MySQL and Redis
After completing the configuration steps, you can connect to the Redis database through your application.
There are several examples available in different programming languages that you can use as a reference.
Make sure to enter the host and database information in your existing code. When connecting to Redis, the Database Host name will be set to the address pointing to the redis.sock file.
Connecting to MySQL and Redis Databases Using PHP
In your PHP code, you can connect to MySQL and Redis databases on your hosting account as follows:
MySQL (PDO):
<?php
$dbHost = "localhost";
$dbName = "cpaneluser_appdb";
$dbUser = "cpaneluser_appuser";
$dbPass = "YOUR_PASSWORD";

$pdo = new PDO(
  "mysql:host=$dbHost;dbname=$dbName;charset=utf8mb4",
  $dbUser,
  $dbPass,
  [PDO::ATTR_ERRMODE => PDO::ERRMODE_EXCEPTION]
);
Redis:
<?php
$redis = new Redis();
$redis->connect('127.0.0.1', 0);

// If your Redis requires authentication:
// $redis->auth('YOUR_REDIS_PASSWORD');

// quick test
$redis->set('ping', 'pong', 10);
echo $redis->get('ping');
Connecting to Redis Databases Using Node.js
Within cPanel, you can create and run Node.js applications through the Software section and the Setup Node.js App option.
import mysql from "mysql2/promise";
import Redis from "ioredis";

const db = await mysql.createPool({
  host: "localhost",
  user: "cpaneluser_appuser",
  password: "YOUR_PASSWORD",
  database: "cpaneluser_appdb",
});

const redis = new Redis({
  host: "localhost",
  port: 0,
  // password: "YOUR_REDIS_PASSWORD",
});

// Example cache-aside
async function getUser(id) {
  const key = `user:${id}`;
  const cached = await redis.get(key);
  if (cached) return JSON.parse(cached);
Connecting to the Redis Database Using Python
Within cPanel, you can run your Python applications through the Setup Python App option.
Running Python Applications in cPanel is possible along with the ability to change the Python version and install various libraries.
import json
import mysql.connector
import redis

db = mysql.connector.connect(
    host="localhost",
    user="cpaneluser_appuser",
    password="YOUR_PASSWORD",
    database="cpaneluser_appdb",
)

r = redis.Redis(host="localhost", port=0, decode_responses=True)

def get_user(user_id: int):
    key = f"user:{user_id}"
    cached = r.get(key)
    if cached:
        return json.loads(cached)

    cur = db.cursor(dictionary=True)
    cur.execute("SELECT * FROM users WHERE id=%s", (user_id,))
    row = cur.fetchone()
    cur.close()

    if row:
        r.setex(key, 60, json.dumps(row))
    return row